
How to Build a Small House Kit: Choosing Land
How Much Land Does My House Kit Need?
Most people are just looking for a simple, small piece of land where they can build their new house kit. Still, others may want enough land for things like keeping horses and having enough space (or easy access to nearby land) where they can ride them. To find out how much land your house kit needs, think of everything besides the home that you realistically want to use your land for, then write it down. Once you’ve listed out these needs, it will be easier to narrow down your choices when browsing plots of land for sale.

Luckily, small house kits come in a variety of shapes, sizes, and dimensions to fit any shape lot. At Mighty Small Homes, we offer house kits as small as 192 sq ft (the 8x24 Tiny home) and have custom designed our other kit home models to be as large as 1200 sq ft (the 30'x40' Modern home). As you can see on our Recent Projects page, some of our customers have built home kits on vast rural property, on the shores of a lake, and even in narrow urban infill lots with a much tighter fit.
How Do I Find Land For Sale?

The first thing you should do is actually visit the areas you’re considering. Drive around. Take a look at the kinds of homes that are already in the area. Find out how close the location is to grocery stores, pharmacies, hospitals, restaurants, and other amenities that are important to you. Here are some tips and resources that can help you find land:
Search real estate property websites
Sites like Zillow, LandWatch.com, LotNetwork.com, Homes.com and RealEstate.com are good places to start and will usually include prices, lot diagrams, and photos.
Find and use an experienced realtor
Finding an experienced realtor who is knowledgeable about land transactions in the area you’re considering can be invaluable. Do your research. Find an agent who has experience representing both buyers and sellers and they will be able to help you navigate through the process.
Tap into your social networks
Word of mouth and social sharing can also help you in your search for land. Make a social post about the kind of property you’re looking for and encourage sharing. You may end up finding something that wasn’t advertised.
Read classified ads (print or online)
Using classified ads to find sellers can be helpful, especially in local or county papers. Also make sure to look at city websites, which can also post ads listing land for sale.
How to Get Power to Your House Kit
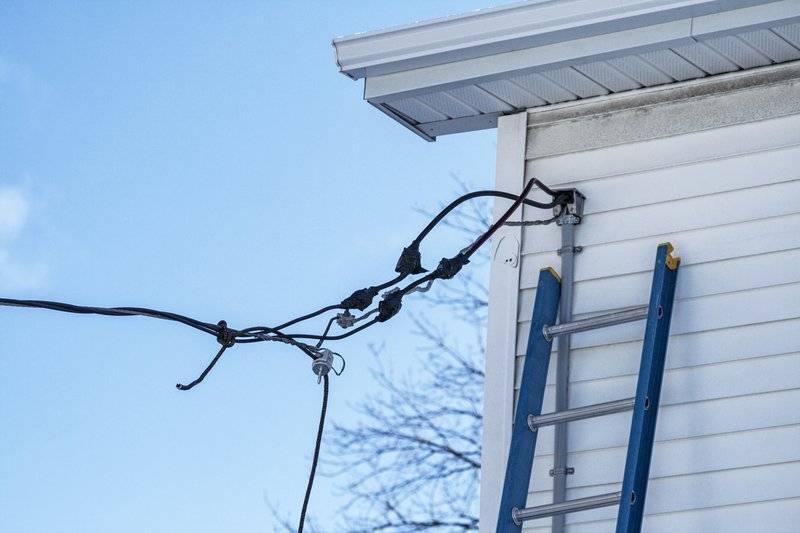
The closer you are to an urban location, the easier it is to get electricity hooked up. If you’re near a city, you’re also very likely near power lines that can be connected. As you move farther away into more rural areas, getting electricity will require some work on your part.
Getting Electricity Connected and Installed
The cost of having power installed varies based on the process involved and the location of your property. The local utility company will be able to determine where the nearest power lines are to the property you’re considering, which will help in estimating the cost for being hooked up. If power lines already exist along the road in front of the property, then having the power company add a pole or two isn’t a big deal. If your property is set off of the road, the costs go up the further you are from those lines. If the property is located 100 feet from the power, most power companies will provide some service lines at no cost. After that, they usually charge by the foot, which can range from $25-$50 per foot. This can add up quickly depending on how many additional poles and feet of wire are needed.
How to Get Access to Water
Gaining access to water for your house kit means one of two things: Either tapping into the municipal water system, or digging a well.
Municipal Water
If you have access to municipal water, that’s typically the easiest and least expensive route. With that said, there is still a process and additional costs involved with tapping into the municipal water supply. Contact the local water company or town works department and they will let you know what you have to do to get hooked up. Those requirements typically involve the following:
- Permits - Find out if you need to file for permits. Many times, your building permit is all they need.
- Fees - The water company will need a set up fee, which varies depending on the company. These fees typically range from $200 on the low end to as much as $5,000.
-
Connecting to water main - The water company will run a pipe from the edge of your property to the water main, but that’s where their responsibility ends. Running pipe from the edge of the property going towards the house is the homeowners responsibility. Most of the time, a licensed contractor will be required to install the rest of the pipe going into the house.
-
Depth of pipe: The colder your climate is, the deeper the pipe will have to be. Your water company will provide the proper depth. The pipe can be copper or plastic (PVC) and will have to meet the specifications laid out by the water company.
- Placement of water meter and valves: The water company will also let you know where the meter needs to be located as well as the proper valving that needs to be present before they make the connection.
- Turn it on - Once all of the above is taken care of, the water company will turn on your water.
-
Depth of pipe: The colder your climate is, the deeper the pipe will have to be. Your water company will provide the proper depth. The pipe can be copper or plastic (PVC) and will have to meet the specifications laid out by the water company.
Digging a Well
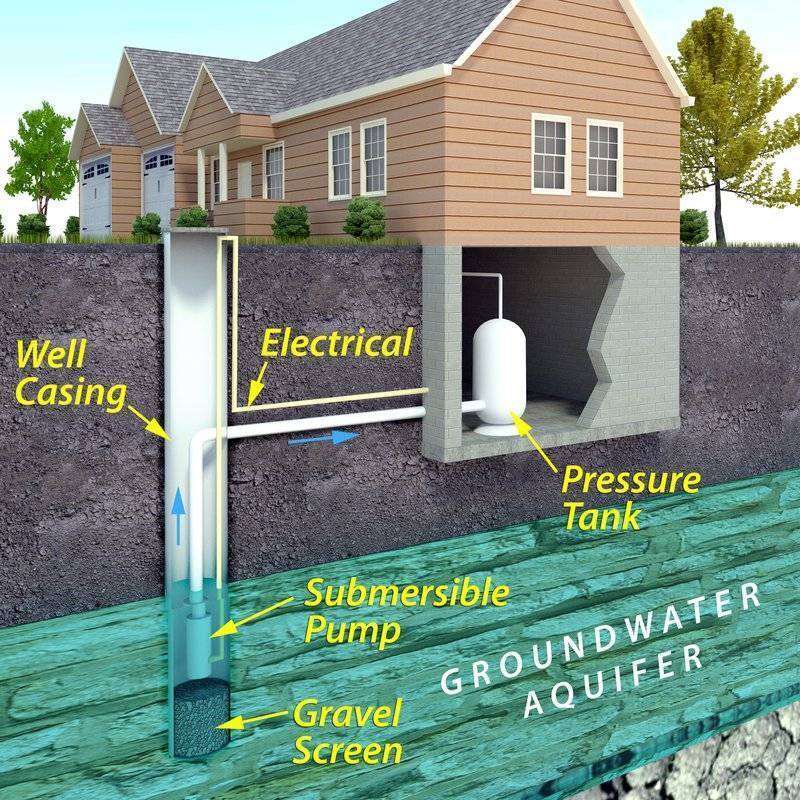
If your land is in a rural area, there’s a good chance that you won’t have access to municipal water. That means you’ll have to dig a well to supply water to your home. While some people attempt to do this on their own, it’s probably best to leave this job to professionals. Here’s what you need to know:
- Find the best location for a well. You professional well driller will be able to find the best place to dig your well. To do this, they’ll look at rock and soil composition, topography, and other factors that affect water supply and quality.
- Drilling the hole. Once the location has been determined, the drilling professional will arrive with a drilling truck that will use multiple ways to find the water underneath, including drilling and pounding. The hope here is that they strike water sooner rather than later.
- Installing the well casing. After the hole is drilled, it’s time to put in the casing in place. The well will then be flushed out to remove any remaining sediment and debris.
Will I Need to Have My Soil Tested?
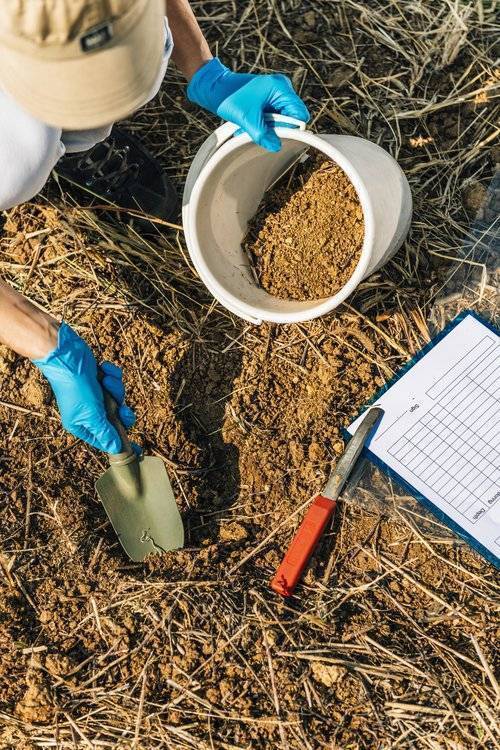
Before you can be issued a building permit, you will most likely be required to perform a soil test of the area you’re planning to build on. This will determine if the soil composition is strong enough to support your home. To test the soil, a series of samples will be collected and sent to a laboratory for analysis.
Soil profiles differ from place to place
No matter where you plan on building, your home needs to be built on strong soil. Depending on the area, soil strength varies. If the soil underneath your home isn’t stable, then shifting may occur and your foundation could crack. The physical makeup of the soil determines its strength. Clay-rich soils, for example, can shrink or expand depending on the moisture content. As a rule, good soil should be able to hold precipitation so that runoff or erosion doesn’t damage the house’s structure.
What kind of soil tests will be performed?
The types of soil tests that will be performed depends on the soil quality. The most common tests include:
- Moisture Content Test - This test uses several different methods to determine the soil’s moisture content, including oven drying, torsion balance method, radiation method, Calcium carbide method, just to name a few. Oven drying is the most common method and involves heating the soil at 110 degrees to dry it out. After 24 hours, the soil is weighed and the difference between the two weights determines the moisture content of the soil.
- Dry Density Test - Dry density is determined using the core cutter method, which involves using a round core cutter to cut and lift the soil from the ground. This sample is weighed and the water content is determined and the dry density is calculated using a unique formula.
-
Atterberg Limits Test - This test uses three limits to determine the quality of the soil:
- Liquid Limit Test - The Casagrande’s liquid limit device is used to measure soil quality.
- Plastic Limit Test - Soil is mixed with water and is formed into a ball, which is then rolled into threads that are 3mm in diameter. If the thread doesn’t break, the moisture content is greater than the plastic limit. The process is repeated reducing the amount of water until it crumbles.
- Shrinkage Limit Test - This is determined using a formula to calculate the shrinkage limit of the soil.
How to Connect to a Sewage System
Getting Connected to Municipal Sewage
If you’re building your new house kit in an area that can be connected to the municipal sewage system, the process of getting connected is pretty straightforward. According to Homeadvisor, cost for connecting a sewer line to a main costs about $2,997 with the typical range being $1,297-$4,794. In many cases, the cost of connecting to the main sewer line to the edge of your property isn’t passed on to the home buyer. Connecting from the edge of your property to your home is the home owner’s responsibility.
The Alternative: Installing a Septic System
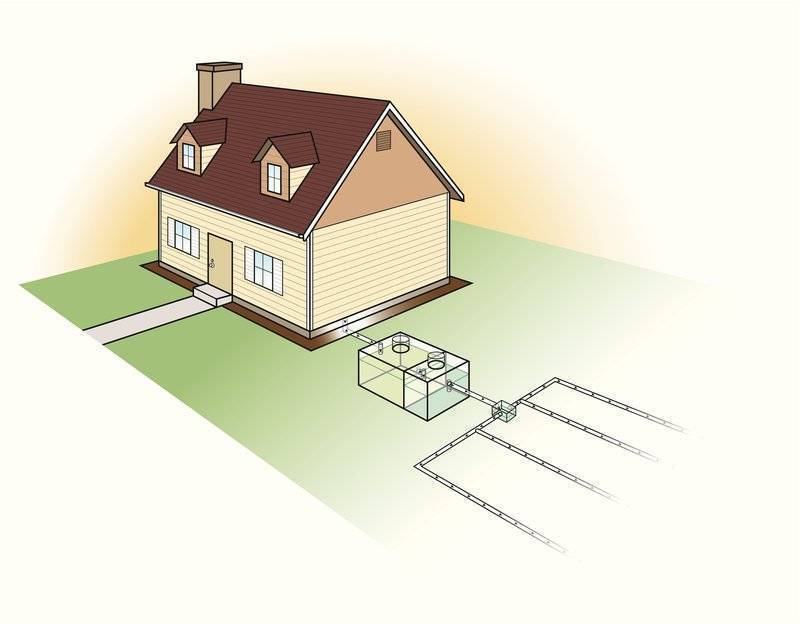
If your land is in an area without access to a municipal sewage system, you will have to install a septic system. Before starting this process, you need to make sure that you are in compliance with the local laws that govern the installation and maintenance of septic systems. This means that you will have to get a septic permit, usually from the county where the land is located. Before the permit is issued, you will have to get a site evaluation, consisting of the following:
-
Site Evaluation - Most site evaluations will include a topography assessment and a soils test, which includes a percolation, or “perc” test. The perc test is used to determine the absorption rate of the soil in preparation of building a septic drain field, also known as a leach field or infiltration basin.
- How do perc tests work? Perc tests involve digging holes into the area that will ultimately become the leach field and filling them with water. After filling the holes to a specific level, the water is timed as it percolates into the surrounding soil.
What will my site evaluation tell me?
Basically, the site evaluation will tell you if your land is suitable for a conventional gravity-fed septic system or if an alternative system will be required. The big difference here is cost. A conventional septic system typically costs about $3,000-$5,000 to install. An alternative system, which is essentially a modified conventional septic system, can go as a high as $40,000.
Where will the septic system be located relative to my home?
As you may have guessed, there are regulations that govern where your septic system can be located on your property. All septic systems need to be far enough away from wells and other water sources. They also have to be located a certain distance away from roads, driveways, buildings, and property lines. If the property you’re considering comes with too many restrictions on where you can build your home and place your septic system, you may want to consider another property.
Your Next Step: Choosing a Foundation
After finding your land, getting your utilities lined up, and making arrangements for your sewage connection, the next step in building your house kit is the choosing and building the foundation that will support your new home. Our next blog in the How to Build a Small House Kit series, "Choosing Your Foundation," will cover everything you need to know about this important step in building your new small house kit, including the differences in foundation types, and how each choice comes with its own limitations and advantages.